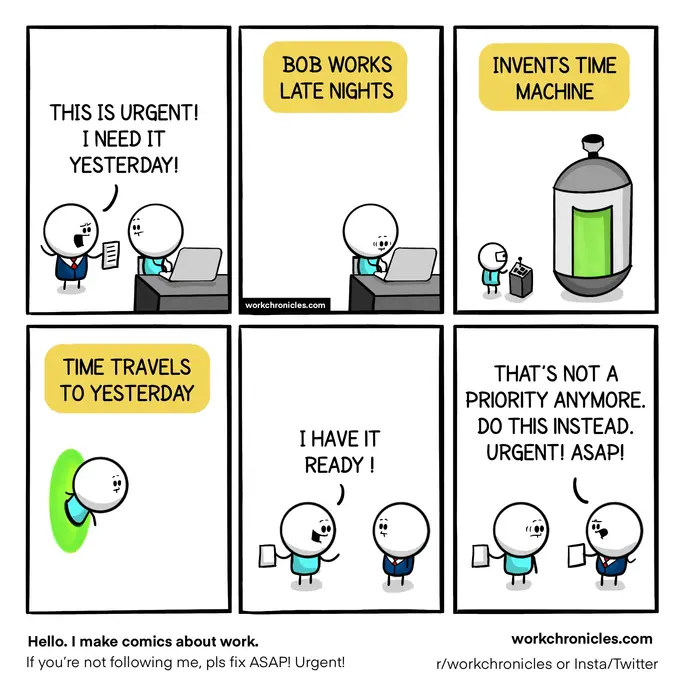
Have you ever faced the nightmare of implementing authentication in your Shiny app under a tight deadline?
I certainly have.
Just a few years ago, a client approached me with a pressing request:
- Add a home page to their existing Shiny app
- Embed a login form in this home page
- And, of course, configure all the authentication mechanism
The catch? They had already missed their own deadline.
Starting at the end of our kick-off meeting, I had one week to understand their existing code, implement authentication, and design a polished home page. Even with the help of a friend for the design, the pressure was immense.
But here’s the kicker… I had never worked with authentication before.
I quickly stumbled upon the shinymanager package. It was a relief… until I realized it lacked a few crucial features needed for the project.
I hustled like crazy that week.
I dove into the package’s code and extended it to fit the client’s requirements. I navigated through the R6 OOP paradigm for the first time ever…
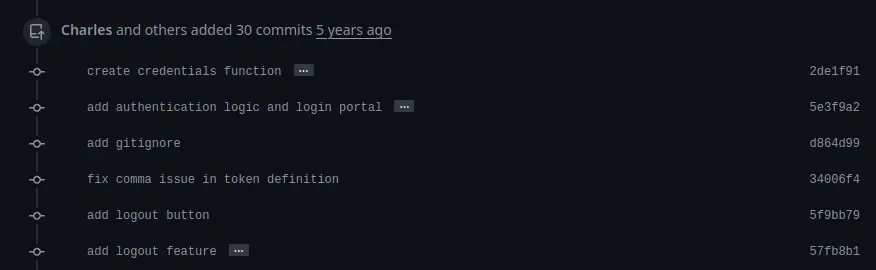
A few days later, I pushed my code to their Git repository:
My first commits building authentication
And then…
Nothing.
No feedback. No confirmation. Just silence.
Were they satisfied? Did the app get used? I never heard from them again. I received my payment from the platform and moved on.
This experience taught me one thing: Building a custom authentication tool is hell. Even with tools like shinymanager. I knew for sure I would never do it again.
Since then, I’ve had the opportunity to test other packages and other tools. And in this article, I want to showcase the one that stands above the rest: Auth0.
Auth0 is a robust authentication platform that simplifies securing your application with ease.
Why Auth0?
The benefits are endless:
- It is simple to setup
- It is secure
- It has a ton of features (you can actually write your own features)
- The UI of the default authentication portal is fully customizable
- It’s free for up to 7,500 monthly active users with basic features
Whether you’re a season Shiny developer or just starting out, managing authentication can feel daunting.
What makes this guide different?
This isn’t just another basic tutorial on Auth0. It is the ultimate guide. The one and only tutorial you will ever need for integrating Auth0 with your Shiny app. Here is what you can expect:
- Understanding Authentication: What it is and how to handle it within Shiny
- Choosing the Right Solution: Identify the best authentication approach for your specific needs
- Implementing Auth0: Step-by-step instructions to add an Auth0 authentication portal to your Shiny app
- Enhancing your portal: Tips to improve and customize your authentication experience
- Advanced tips: Solutions to common challenges and questions you might encounter
By the end of this guide, you’ll have a fully authenticated Shiny app using Auth0.
Let’s get started!
1. Understanding Authentication
1.1. Identification vs Authentication vs Authorization
First, a word about vocabulary. Do you know the difference between authentication, identification, and authorization?
- Identification is me stating my identity.
- Authentication is the process of verifying my identity. For example, someone will check my ID card to ensure I am the person I state to be.
- Authorization is about allowing or denying access to a resource for a given identity.
When I use a login and a password, I am authenticating myself. The login is my identity, and my identity is verified because I provide the correct password that goes with it.
But authentication is not sufficient to gain access. To gain access, I also need to be authorized. For that, the system will check that my identity is allowed to access the content I’m trying to reach. For example, if I don’t have administrator access, I might be authenticated but it won’t be enough to access the admin page.
On the other hand, authentication is not always necessary to gain access. In some cases, you only need to provide a password to be authorized. In this case, there is no identification nor authentication. As long as you know the password, you can get in. We don’t care who you are.
In the rest of the article, I will use the word authentication for simplicity, but understand it accounts for both authentication AND authorization.
1.2. Should you handle the authentication inside Shiny?
Let’s first understand how a Shiny app works without authentication:
- Your browser sends a request over the internet
- A web server* (like nginx or Apache) receives the request and forwards it to the Shiny Server.
- Shiny Server processes the request and sends back a response.
- The response travels back through the same path to your browser.
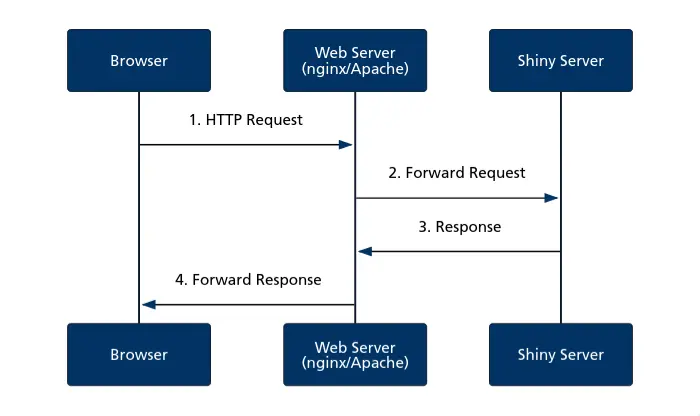
*A web server is a software installed on a server whose role is to handle incoming traffic and dispatch it to the right place (the Shiny Server, for example). It can also provide other features, such as encrypting the communication (with HTTPS/TLS), etc.
Now, where could we implement authentication in this flow?
- On your computer
- In transit between client and server
- At the web server level (nginx/Apache)
- In the Shiny application itself
Options 1 and 2 are not secure. Authentication must happen on systems we control. This leaves us with options 3 and 4, which are both valid approaches with different tradeoffs:
Method 1: Web Server Authentication
Here is how this method works:
- Your browser sends an HTTP request to access the Shiny app
- The web server intercepts the request and checks authentication status*
- If not authenticated, the user is redirected to a login page
- If authenticated, the request is forwarded to Shiny Server
- Shiny Server processes the request and sends back a response
- The response travels back through the web server to your browser
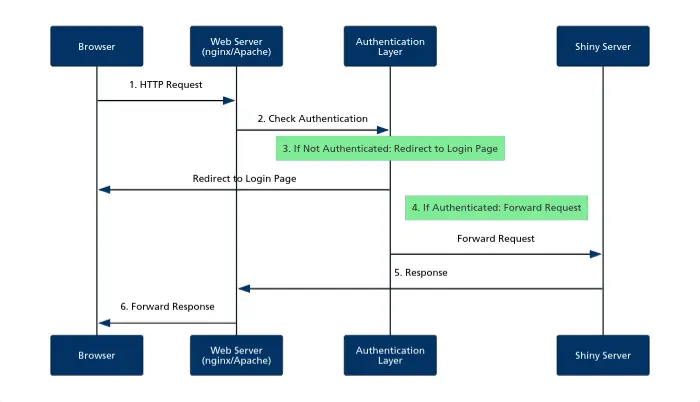
*For now, don’t worry about how the authentication is implemented. Simply acknowledge that “some software” is able to check whether the user is authenticated or not.
Here are the pros and cons of this method:
| Pros | Cons |
|---|---|
| Better Separation of Concerns | Requires more server administration knowledge |
| Can protect multiple applications | Less application-specific control |
| Often better performance |
Overall, this method is cleaner and more secure, but will ask more work from your side. I would recommend this option:
- If you have some experience with authentication,
- If you’re not afraid to spend more time configuring your web server,
- If you want to have a clear separation of concerns.
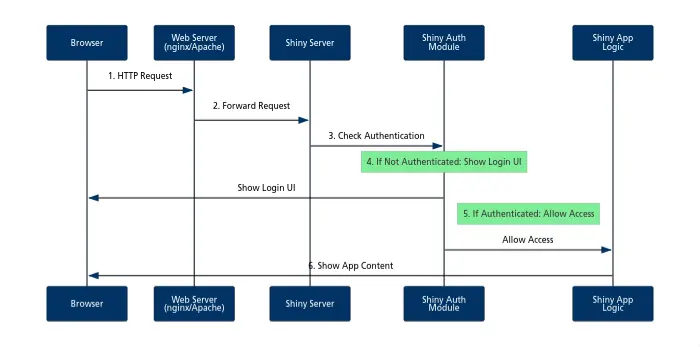
Method 2: Shiny App Authentication
Here is how this method works:
- Your browser sends an HTTP request to access the Shiny app
- The web server forwards the request to Shiny Server
- Shiny Server passes the request to the authentication module
- If not authenticated, the user sees a login UI
- If authenticated, the request is passed to the main app logic
- The app content is sent back through the chain to your browser
| Pros | Cons |
|---|---|
| More flexible and customizable | Must be implemented for each application |
| Easier for R developers to implement | Consumes application resources |
| Better integration with app logic |
The main benefit of this method is that it is much easier to implement. You don’t need to know how to configure a web server such as nginx, or how to send security HTTP headers. You can stay within the familiarity of your R ecosystem.
How to choose the right method?
As you can guess, there is no right method. Some solutions will work best in certain situations, depending on your needs.
In my case, I prefer method 1, because it is cleaner and more secure. You authenticate users before they even reach the Shiny app and execute a single line of R code. They will never reach it if they are unable to authenticate, and I love this approach.
However, in practice, I actually implement method 2 a lot more frequently. Because it is less expensive for my clients, and I don’t always have necessary access levels to configure their servers anyway.
Now…
Previously, we talked about a “Shiny Auth Module” or an “Authentication Layer”, but what are those anyway?
It is now time to compare the different alternatives at your disposal and especially… to show why Auth0 is probably your best option.
2. Choosing the Right Authentication Solution
When implementing authentication for your Shiny app, you have three main options:
- Build your own custom authentication solution (don’t)
- Use existing R packages designed for Shiny authentication
- Use a language-agnostic professional authentication service
Here is the high-level comparison of these approaches:
| Solution Type | Security | Features | Ease of Use | Cost | Best For |
|---|---|---|---|---|---|
| Custom Built | Low-Medium | Limited | Complex | Free | Never |
| R Packages | Medium | Basic | Easy | Free | Internal Apps |
| Auth Services | High | Complete | Medium | Free-Premium | Production Apps |
Let’s see the pros and cons of each approach.
2.1. Building a Custom Authentication Solution

I do not recommend this approach.
It’s not easy.
You need to know about common security vulnerabilities, such as hijacking, SQL injection, cross-site scripting, and more.
If you write it, you will have to maintain it and update it for security measures.
You will invest a ton of time… for something that already exists.
Except if you’re a security expert, or if you want to do it for academic purposes, otherwise… just don’t do it.

2.2. Use a custom solution from someone else
There are plenty of packages that bring authentication-in-a-box to your Shiny app:
- shinymanager: You have encrypted credentials and SQL backend support
- shinyauthr: Simple cookie-based authentication
- login: Basic authentication
- polished: More comprehensive solution with user management and more
I think these packages are excellent for internal applications, when you need a quick implementation and you don’t want to go through the hassle of using a third party.
However, I don’t think they’re secure and feature-rich enough for public-facing applications.
They have been developed by R programmers, people like you and me, maybe a bit more expert than us, but still. They’re not necessarily security experts, and the packages haven’t been audited.
Second, you will lack features. Authentication is complex. Eventually you will need things like:
- Session management: For persisting and renewing the sessions with the use of cookies
- User management: Reseting the passwords, sending emails, verifying email addresses
- Multi-Factor Authentication: For extra security
- Role-based access: When you have different permission levels (user, admin) or an application that is adaptative based on user data
- Social Login: To give easy access through Google, Facebook, Github, etc.
All in all, these packages are great for prototyping or for an internal app. But I wouldn’t recommend them for a public app in production.
2.3. Using Professional Authentication Services
Professional services offer several advantages:
- Built and maintained by security experts: It’s THEIR job. They eat Linux Kernel security vulnerabilities for breakfast, and they will push security patches as soon as they’re available.
- Full feature sets: If you want a feature, chances are they have already developed it.
- Plenty of documentation and support: They have a dedicated team to help you.
These professional services are:
- Auth0 (of course)
- Okta
- Clerk
- AWS Cognito (or the equivalent at Azure or GCP)
- SuperTokens
- And more…
Of course, these services have drawbacks:
- You might have to pay for it.
- They are not always as easy to integrate with a Shiny app.
Which is why I love Auth0:
- You can use it for free, up to 7500 active monthly users.
- It is super easy to integrate with a Shiny app, thanks to the auth0 package.
What about the other solutions?
I actually can’t tell you much about Okta, Clerk, or SuperTokens. They might be great, but I have never used them. For a good reason: they’re not easy to integrate with a Shiny app. I would have to build a package similar to auth0 to interface them.
However, I have used AWS Cognito quite a bit for clients who host their app on AWS.
And here is my experience: Don’t use it. I hate it.
- The hosted UI is barely customizable. Compared to Auth0, it is day and night.
- While being an AWS service, it actually doesn’t integrate that well with other services. As a simple example, if you replicate your Shiny app over two AWS regions, you will have to manage two independent databases for Cognito, with no ability to synchronize them.
- It simply has less features, the documentation is worse, etc.
- I just don’t like it.

Compared to Auth0, I don’t see any good reason to use Cognito.
So…
How would you implement Auth0 in your Shiny application?
That’s what coming next.
3. Add an Auth0 authentication portal to your Shiny app
You’re still reading?
Congrats on making it this far. I know the beginning was a bit theoretical and we didn’t do anything concrete, but it was important to set up the foundations.
Now, we’re going to finally add authentication to your app.
First, let’s make a basic app. I’m creating two files:
fluidPage(
    titlePanel("Basic App")
)function(input, output, session) {
}That’s a basic app. I didn’t lie to you.
Our goal now is to protect the content of this app with an authentication portal.
Spoiler:At the end of this section, you will have 6 files:
ui <- fluidPage(
    titlePanel("Basic App")
)
auth0::auth0_ui(ui)
server <- function(input, output, session) {
}
auth0::auth0_server(server)name: myApp
remote_url: ""
auth0_config:
api_url: !expr paste0("https://", Sys.getenv("AUTH0_TENANT"), ".", Sys.getenv("AUTH0_REGION"), ".auth0.com")
credentials:
key: !expr Sys.getenv("AUTH0_CLIENT_ID")
secret: !expr Sys.getenv("AUTH0_CLIENT_SECRET")AUTH0_TENANT=datachamp-article-auth0
AUTH0_REGION=eu
AUTH0_CLIENT_ID=K2PUnHPBhyxvhfGs5to0FXfxeBIV9bBm
AUTH0_CLIENT_SECRET=mysupersecret.Renvironoptions(shiny.port = 4050)Don’t worry. I will explain everything.
3.1. Create and Configure an Auth0 Account
The first step will not happen in R. You have to first configure your Auth0 account.
Creating Your First Tenant
Go to https://auth0.com/ and create your account.
At the end of the account creation, you will be asked to create your first Tenant.
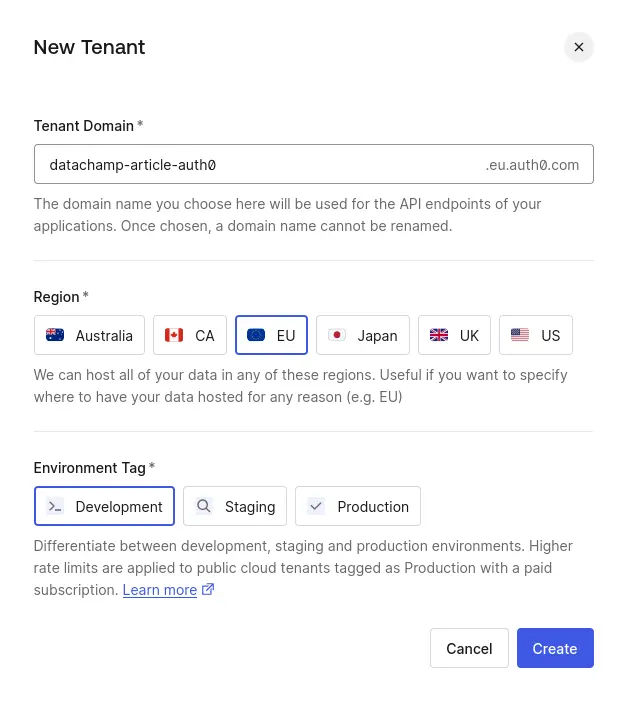
You can think of a Tenant as a sub-account:
- You define an ID. I will create mine as
datachamp-article-auth0. - You choose a Region. I will create mine in the EU region, because that’s where I live.
- You choose an Environment Tag: Development, Staging, or Production. This is mostly for you, as a way to organize your environments. Except if you have a paid subscription, in which case Production Tenants have higher rate limits.
The Tenant will contain your user database, the configuration of the authentication mechanisms, the customization of the authentication portal, etc.
In general, we create one Tenant per app. If you have the same user base for multiple apps, you could consider having one Tenant for multiple apps.
Once the Tenant is created, Auth0 will take you through a tour to show you around. To be honest, it’s not really useful. They will ask you to type the technology you’re using. You will type “Shiny”, and all you will notice is how the R community is, once again, ignored and disregarded.
…
Anyway.
Creating a New Application
From the sidebar, go to Applications > Applications. There, you should see a “Default App”. Click on it, go to Settings, scroll to the danger zone at the bottom, and delete it. We’re going to create a new one from scratch.
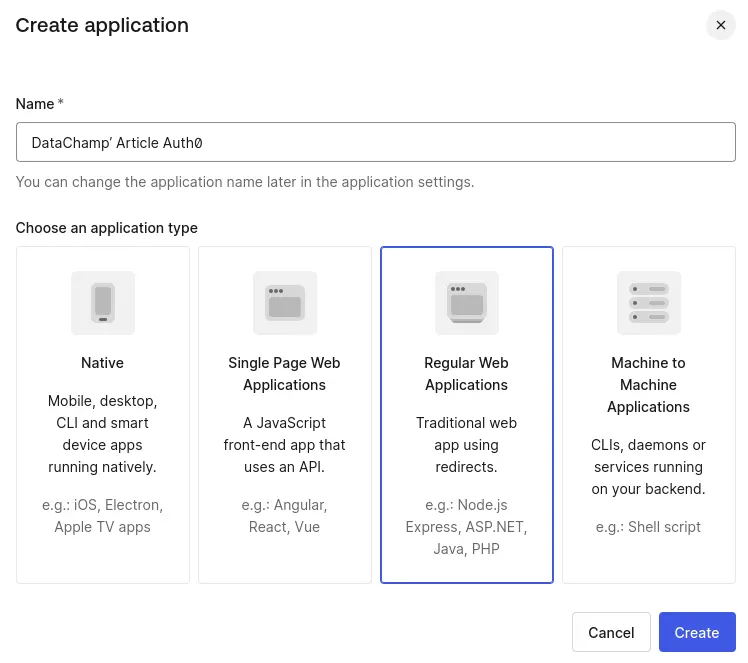
Create a new Application, and choose the following configuration:
- Name: Enter the name of your application. I will enter “DataChamp’ Article Auth0”.
- Application type: A Shiny app is a Regular Web Application.
You will land on the Quickstart tab of your new Application. And they will ask you the technology you are using for the project.
And…
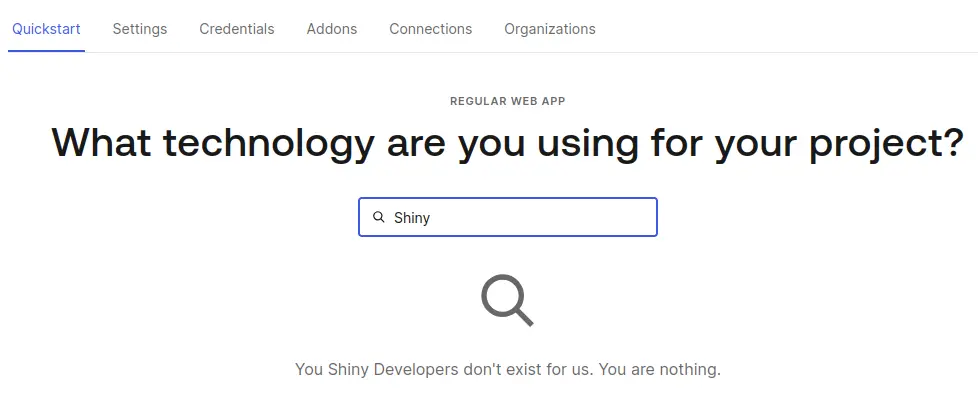

Well.
Let’s continue.
Configuring Application Settings
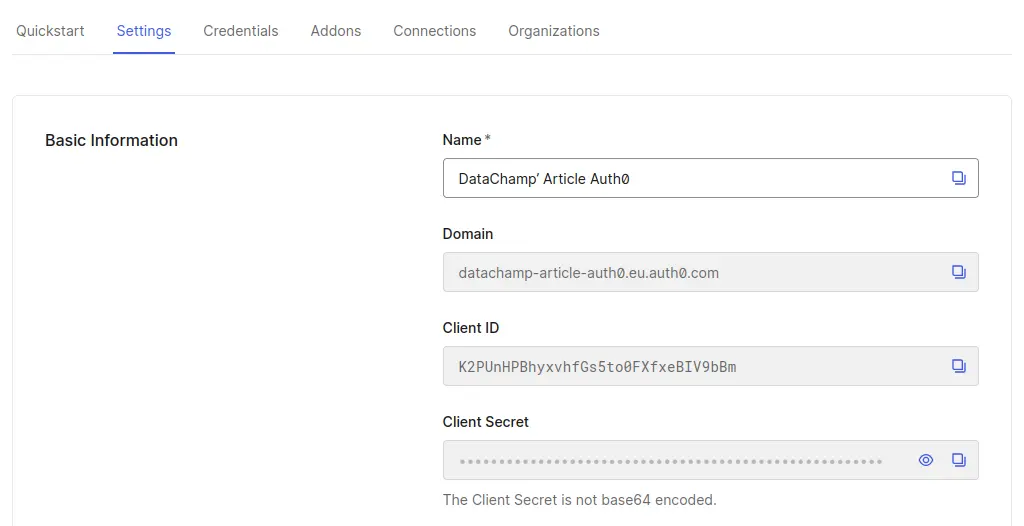
Go to the Settings tab and let’s go through the different settings:
- Name: That’s the name you chose earlier. You can still change it at any time.
- Domain: The domain is linked to your Tenant ID, so you cannot change it. The format is basically
{tenant_id}.{region}.auth0.com. Your authentication portal will be hosted on this URL, so keep in mind your users might see it. - Client ID and Client Secret: These will be used later when configuring the Shiny app. No need to write them down on a piece of paper, but remember you can find them here.
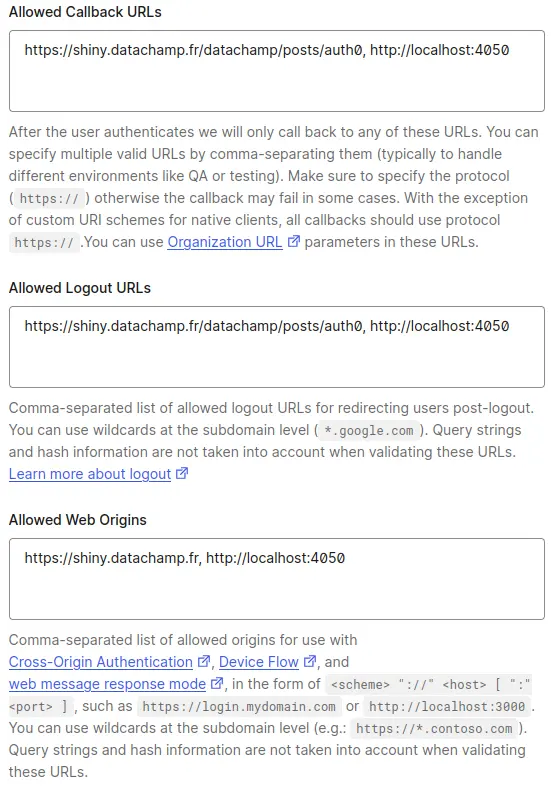
Scroll down a bit until Application URIs. You will need to add the URLs where your app will be hosted in the three following forms:
- Allowed Callback URLs
- Allowed Logout URLs
- Allowed Web Origins
Auth0 wants to ensure that your authentication portal will be used only for your apps, and that a malicious user who would find your Client Secret can’t use your authentication portal for their app. Yes, that’s a little bit weird … but think of it as a security feature.
You actually need to enter two URLs in each field. I will add:
https://shiny.datachamp.fr/datachamp/posts/auth0: This is the future address where I will host my app.http://localhost:4050: This is for when I will be working on my app. You know how Shiny always starts a local server on your computer. Well, you need to put this in the allowed list of URLs as well. Here, I choose 4050 as the port number, but you can choose any number between 1000 and 9999.
Later, in Shiny, I will add an option so that the local Shiny server always uses 4050, otherwise it assigns a port at random.
If you don’t know the future URL of your app, no worries. Simply enter the localhost one, and you’ll fill the rest later.
You can copy/paste the same URLs in the first two text boxes. For Allowed Web Origins, we only need to enter the beginning of the URL (https://shiny.datachamp.fr) and not the full address. Here goes:
You can leave the rest of the configuration as is. Don’t forget to hit Save changes at the bottom of the page.
Setting Up Authentication Methods
Next, go to the Connections tab. This is where you can choose how people can connect to your app. It can be:
- Username-Password authentication
- Social logins: You log in through a public identity provider, such as Google, Microsoft, Facebook, Github, etc.
- Enterprise: You log through your own identity service using OpenID Connect, SAML, etc. usually to implement SSO (Single Sign-On).
- Passwordless: There is no password. For each connection, the user will receive a temporary password by SMS or email.
In our case, we’re going to only cover the usual Username/Password connection, so you can disable the default google-oauth2 connection that’s already there. You can also completely remove this default connection by going to Authentication / Social from the sidebar, and then remove google-oauth2.
General Settings
I want to conclude with some general settings (i.e. not application-specific). I will show you what I deem to be the most important options, but feel free to explore the rest of the Auth0 interface for additional settings.
Go to Settings in the sidebar. From the General tab, you can configure the options that will improve the look of your future authentication portal:
- Friendly Name: This name will appear instead of the Tenant Name. For example, it would write “Data Champ’” instead of “datachamp-article-auth0”.
- Logo URL: Enter an URL where your logo is hosted.
- Environment Tag: You already chose the environment when creating the Tenant. You can always change it here.
- Languages: You can support multiple languages for your authentication portal. Once activated, the portal will change the language based on the user’s browser settings.
For now, we covered everything we needed for the initial setup.
Next step: Shiny.
3.2. Connect Shiny to your Auth0 Application
Setting Up Configuration Files
Create a new file named _auth0.yml at the root of your project:
name: myApp
remote_url: ""
auth0_config:
    api_url: !expr paste0("https://", Sys.getenv("AUTH0_TENANT"), ".", Sys.getenv("AUTH0_REGION"), ".auth0.com")
    credentials:
        key: !expr Sys.getenv("AUTH0_CLIENT_ID")
secret: !expr Sys.getenv("AUTH0_CLIENT_SECRET")Replace the name with your Application name and make sure there is an empty new line at the end of the file.
This file will contain the Client ID and Client Secret we saw earlier when configuring the Auth0 Application. However, we do not want to write the values directly in the file.
Why?
Because secrets. And because environments.
Managing Environment Variables
This _auth0.yml file will be sent over to your coworkers, or to your Github repository. It might get public at some point. In short: you should never write a password in a file that will be sent to other people. And the Client Secret IS a password.
As to environments: eventually, you might have an Auth0 Tenant for development, one for staging, and one for production. For each environment, the values will be different. Rather than manually editing the values all the time, we write them down in a file that is made for configuring the R environment.
Create the .Renviron file at the root of your project directory:
AUTH0_TENANT=datachamp-article-auth0
AUTH0_REGION=eu
AUTH0_CLIENT_ID=K2PUnHPBhyxvhfGs5to0FXfxeBIV9bBm
AUTH0_CLIENT_SECRET=mysupersecretThis .Renviron file should include secrets that should never get committed in a Git repository (or sent to other people), as well as values that might change from one environment to the next.
If you’re using Git, don’t forget to add it to your .gitignore:
.RenvironReminder: you can find the Client ID and Client Secret in your Auth0 account. Go to Applications > Applications, select your Application, and then Settings:
Once done, restart your R session so that the environment variables are taken into account. When you run Sys.getenv("AUTH0_TENANT") in your console, it should display the value from the .Renviron file. If it does not, ensure that your session starts in the working directory of your project, where the .Renviron file is located.
For more information on how the .Renviron file works, you can read this article. It’s a very useful tool when hosting Shiny apps in production.
Configuring the Port Number
Now..
Remember when we added the URLs to the Auth0 Application settings? We decided to authorize http://localhost:4050.
Now, we need to tell Shiny to always run the local server on this port number. To do that, it’s really easy, you simply have to run:
options(shiny.port = 4050)I recommend you put this option in a .Rprofile file. In the same vein as .Renviron, except this file will contain R instructions that will always be run when you start an R session.
You should already have a .Rprofile file if you’re using renv (which I recommend you do: read more about it here).
options(shiny.port = 4050)By the way… The port number could also be an environment variable and set in the .Renviron file, in which case you would then call options(shiny.port = Sys.getenv("SHINY_PORT")).
Let’s refocus.
We’re almost there.
Adding Auth0 to Your Shiny App
It’s now time to add the auth0 package to the app. Here are the necessary changes:
ui <- fluidPage(
    titlePanel("Basic App")
)
auth0::auth0_ui(ui)
server <- function(input, output, session) {
}
auth0::auth0_server(server)That’s… it?
Yep. That’s it.
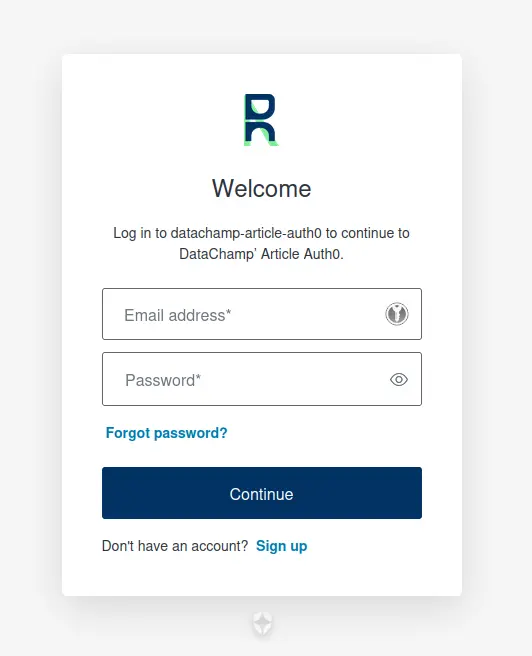
Run the app, and you should see the authentication portal:
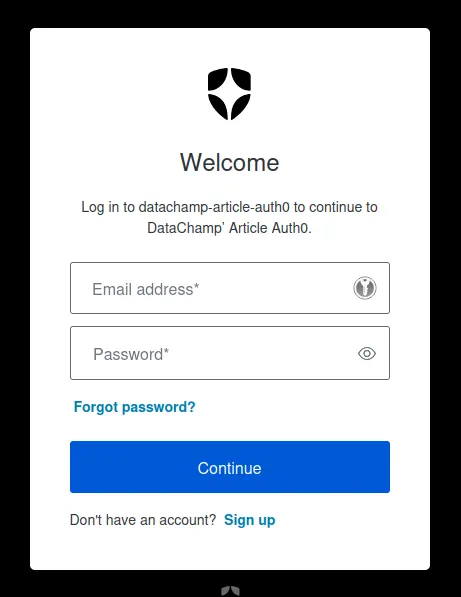
You will see the authentication portal needs to be customized. The text is a little bit weird, the colors may not be yours, and so on. No worries, everything can be customized.
3.3. Troubleshooting
Having some issues?
There is no package called ‘auth0’
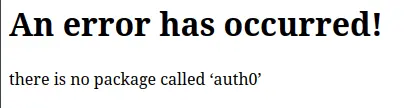
This means you forgot to install the package auth0. Install it:
install.packages("auth0")We can’t connect to the server at ..auth0.com.
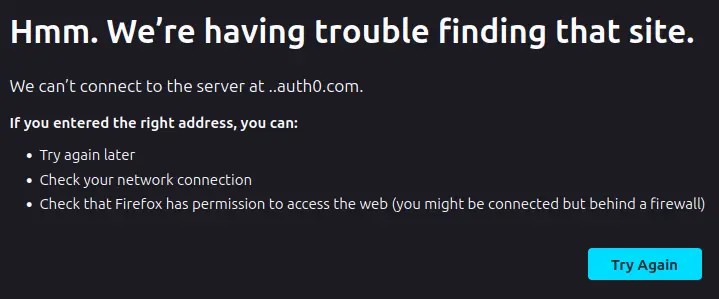
It means you got redirected to the Authentication portal. Except… it redirected you to the address https://..auth0.com.
The most likely reason is that your environment variables are empty. They either don’t exist or aren’t properly loaded in session. Check out this article on .Renviron to learn more on how to fix this.
Callback URL mismatch
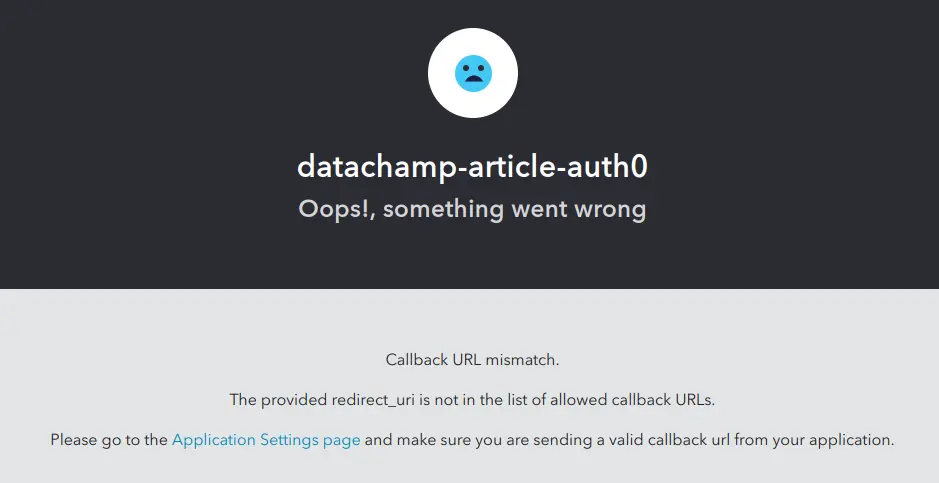
Notice the error message is a little bit below in the image: “The provided redirect_uri is not in the list of allowed callback URLs.”
If this happens, have a look at the URL of this error page. It contains the variable in an URL encoded way. Here is a break down of the URL I see:
https://datachamp-article-auth0.eu.auth0.com/authorize? \
    client_id=K2PUnHPBhyxvhfGs5to0FXfxeBIV9bBm& \
    scope=openid%20profile& \
    redirect_uri=http%3A%2F%2Flocalhost%3A3726& \
    response_type=code& \
    state=5hVXwbxP2z
It’s a little bit hard to read because every non-ASCII character is encoded, but basically the redirect_uri is configured to be http://localhost:3726.
That means it’s using a random port number.
Use options(shiny.port = 4050) or whatever port number you configured in the Callback URLs of the Auth0 Application settings.
4. Improve your New Authentication Portal
You’re set now.
After starting your Shiny app, use the login screen to create yourself an account.
You may be curious about the “Authorize App” screen you get after creating the account. You can read more later in the article: How to remove the Authorize App screen after signing up on Auth0
For now, I want to show you how to improve your authentication portal for the most basic needs.
4.1. Add a Logout Button
The first thing you might wonder is… how do I logout?
Well, every time you start the app, it logs you in automatically.
Fortunately, adding a logout button to your app is very easy thanks to the auth0 package. You only need to add one line to your ui.R file:
ui <- fluidPage(
    titlePanel("Basic App"),
    auth0::logoutButton()
)
auth0::auth0_ui(ui)
You don’t even need to do anything in the server.R file as long as you have only one logout button. If you want to have more, I invite you to check the documentation of the auth0::logoutButton() function.
4.2. Access user information after authentication
The next thing you might want to do is knowing who your user is. This is especially important when you want to have a specific behavior depending on who is connected to your app.
The user information data is automatically stored in the session$userData$auth0_info object.
To obtain it, you must make a small change to the files:
- Create a
global.Rand set theauth0_infovariable. - Pass the
auth0_infonewly created variable to the functionsauth0::auth0_uiandauth0::auth0_server.
Here are the files:
ui <- fluidPage(
    titlePanel("Basic App"),
    verbatimTextOutput("user_info"),
    auth0::logoutButton()
)
auth0::auth0_ui(ui, info = auth0_info)
server <- function(input, output, session) {
output$user_info <- renderPrint({
session$userData$auth0_info
})
}
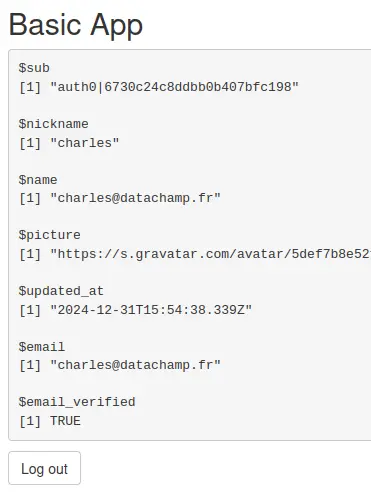
auth0::auth0_server(server, info = auth0_info)auth0_info <- auth0::auth0_info()And the result:
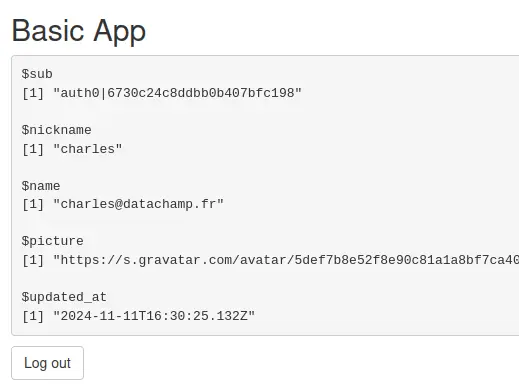
This is a list with 5 items:
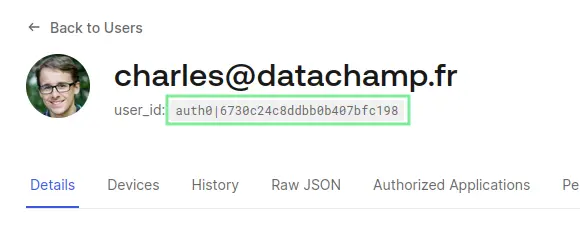
- The
subis the Auth0 User ID. If you connect to your Auth0 admin interface, go to User Management / Users, and select the user, you will see it:
- The
nicknameis most likely the left-hand side of the email address, generated automatically. Note that you can require users to enter a username when signing up. - The
nameis the email address. - The
pictureis automatically fetched from Gravatar based on the email address of the user. - The
updated_atis exactly what it says.
Based on this information, you can personalize a welcome message to your users.
But… that’s not a lot of information either. It feels that if you want to store more data, you would have to build your own database on the side and store data based on the Auth0 User ID.
Well, that’s an option.
But we’ll see later in the article that you can also use Auth0 as your database to store data on users in 5.5. How to Store and Access Auth0 User Data in Shiny.
4.3. A word on security
Before we go further…
I want to quickly circle back to the discussion we had earlier about the two main methods for authentication, i.e. setting it up at the web server level or at the Shiny app level.
Here, we are setting it up at the Shiny app level. Note that we could also configure Auth0 at the web server level, but that is not the purpose of this tutorial.
The benefit of this method is that it’s super easy to set up:
- The configuration on Auth0: you just created an account and added your URL there.
- The configuration on Shiny: you just wrapped the
uiandserverobjects with functions from theauth0package.
It wouldn’t be that easy at the web server level.
However, the drawback of this method is that you must be a little bit more careful on the security side of things.
Did you notice how the auth0 package works?
- First, the Shiny app starts loading.
- Then, the screen greys out and you get redirected to the Auth0 authentication portal.
- You log in.
- You are redirected again to the Shiny app and the URL has been appended with some sort of code:
?code=gPuf8Letc...
What I want you to focus on are the first two steps: You start loading the Shiny app before you are logged in. And this is something you must be careful about.
Everything from the UI is protected.
This comes from the way the auth0::auth0_ui() works. Before even loading the UI, it will check for the code in the URL. If the code is not present or incorrect, then it directly loads the UI as follows:
<!DOCTYPE html>
<html>
<head>
  <meta http-equiv="Content-Type" content="text/html; charset=utf-8"/>
  <script type="application/shiny-singletons"></script>
  <script type="application/html-dependencies">jquery[3.6.0];shiny-css[1.9.1];shiny-busy-indicators[1.9.1];shiny-javascript[1.9.1]</script>
<script src="jquery-3.6.0/jquery.min.js"></script>
<link href="shiny-css-1.9.1/shiny.min.css" rel="stylesheet" />
<link href="shiny-busy-indicators-1.9.1/busy-indicators.css" rel="stylesheet" />
<script src="shiny-javascript-1.9.1/shiny.min.js"></script>
</head>
<body>
  <script>location.replace("https://datachamp-article-auth0.eu.auth0.com/authorize?client_id=K2PUnHPBhyxvhfGs5to0FXfxeBIV9bBm&scope=openid%20profile&redirect_uri=http%3A%2F%2Flocalhost%3A4050&response_type=code&state=ye75t9rCne");</script>
</body>
</html>
Don’t panic. This is only the HTML code that is loaded before the user is logged in. Most of this is loading CSS and JS files.
Then, in the body, there is a single JavaScript line of code that redirects to the Authentication portal.
The UI from your code is never loaded, so there is no risk of leaking information.
However … Not everything from the server is protected !
All the outputs are protected, since they depend on their UI equivalent to load. E.g. for uiOutput, plotOutput, tableOutput, or any other Shiny outputs, there is nothing to worry about.
However, if you have a simple observer, the code inside of it can be run without the user being logged in.
Here is an example:
ui <- fluidPage(
    titlePanel("Basic App"),
    verbatimTextOutput("user_info"),
    auth0::logoutButton()
)
auth0::auth0_ui(ui, info = auth0_info)
server <- function(input, output, session) {
output$user_info <- renderPrint({
session$userData$auth0_info
})
observe({
print("test")
})
}
auth0::auth0_server(server, info = auth0_info)auth0_info <- auth0::auth0_info()I simply added a observe(print("test")) statement in the server.R file.
If you try this app, you will notice that "test" appears twice:
> shiny::runApp()
Loading required package: shiny

Listening on http://127.0.0.1:4050
Browsing http://127.0.0.1:4050
[1] "test"
[1] "test"
- The first time before being logged in
- The second time after being logged in
This shows that Shiny code was executed before the user was logged in.
In all likelihood, this will be harmless.
But depending on your app, it might not be the case.
Despite using a secure tool like Auth0, you are still responsible for the code you write and must be aware of potential security vulnerabilities.
How can you ensure this code is never run for an unauthorized user?
Well, to check if the user is logged in, use the session$userData$auth0_info object we discussed in the previous section. If the user is not logged in, the object will be NULL.
You can simply use the req() function (check the help page if you don’t know this function) to block further code execution if the object is NULL:
ui <- fluidPage(
    titlePanel("Basic App"),
    verbatimTextOutput("user_info"),
    auth0::logoutButton()
)
auth0::auth0_ui(ui, info = auth0_info)
server <- function(input, output, session) {
output$user_info <- renderPrint({
session$userData$auth0_info
})
observe({
req(session$userData$auth0_info)
print("test")
})
}
auth0::auth0_server(server, info = auth0_info)auth0_info <- auth0::auth0_info()Now, only one "test" appears:
> shiny::runApp()
Loading required package: shiny

Listening on http://127.0.0.1:4050
Browsing http://127.0.0.1:4050
[1] "test"
Now, you’ll have a better understanding of why the first method, where the authentication happens before the requests reach the Shiny Server, is more secure.
Here, we went with the method that is easier to implement. The price to pay is that you have to pay attention to security within your Shiny code.
Alright, now that the boring-but-important stuff about security is out of the way, let’s talk about design!
4.4. Redesign the Authentication Portal
What do you think of the default authentication portal?
Really, it’s not too bad.
But it doesn’t have a lot of personality.
Go back to the Auth0 Admin interface, and go to Branding > Universal Login. From there, you can:
- Select a logo
- Update the primary color
- Update the background color
Don’t worry, you will have more than just 3 options.
But…
Realize that this is already more than you can do with AWS Cognito 🤡
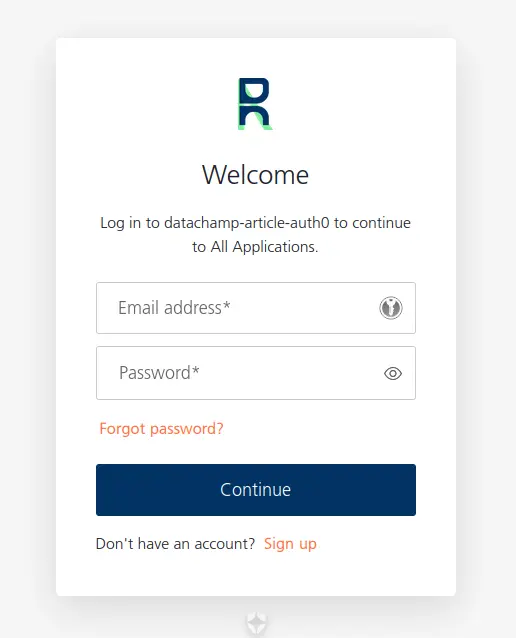
After editing a few values, I get:
… and it already has the vibe of the Data Champ’ brand !
Now, click on Customization Options. This is where everything related to design can be changed:
- I’m updating the other colors to match the Data Champ’ brand
- I’m linking to the font we use on the website
- I’m slightly increasing the font size
- And… that’s kind of it actually.
You might have noticed the Auth0 logo at the bottom. This is due to having the free version. If you want to remove it, you will need to upgrade to a paid plan.
4.5. Customize the text
Next, we want to update the text displayed in the authentication portal. Go back to Branding > Universal Login and click on Advanced Options.
The first option you will see is about “Universal Login” vs “Classic Login”. Basically, the “Classic Login” is their old way of doing things. I wouldn’t recommend going this route.
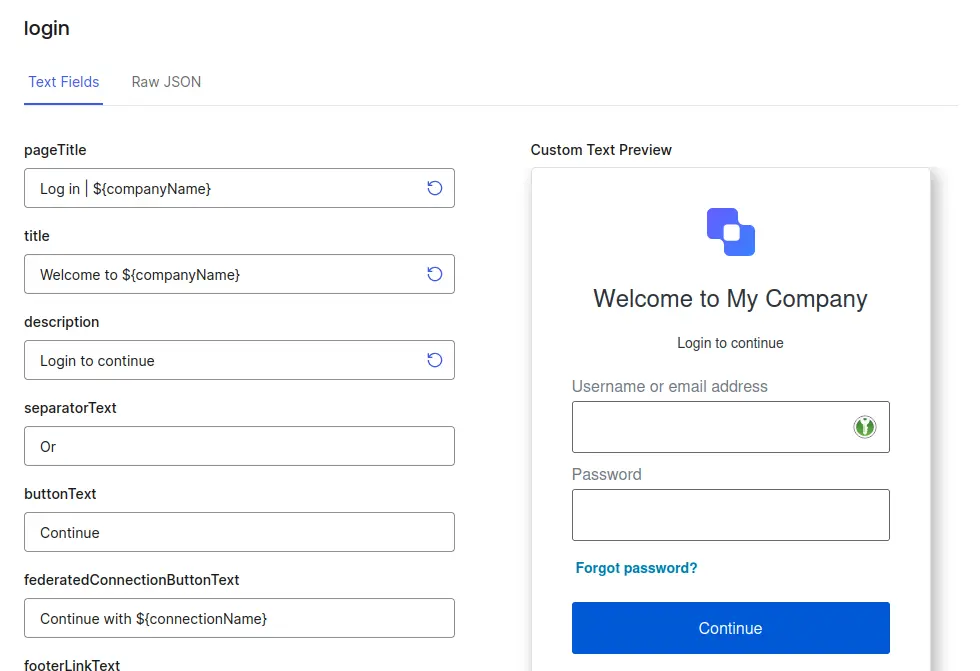
Instead, click on the Custom Text tab. This is where you can customize every piece of text.
At the top, you can choose:
- The Language: This will customize the text for a specific language. Remember that you can activate or deactivate specific languages in the overall Settings.
- The Prompt: This corresponds to the step of the authentication process: logging in, signing up, entering 2FA code, recovering password, etc.
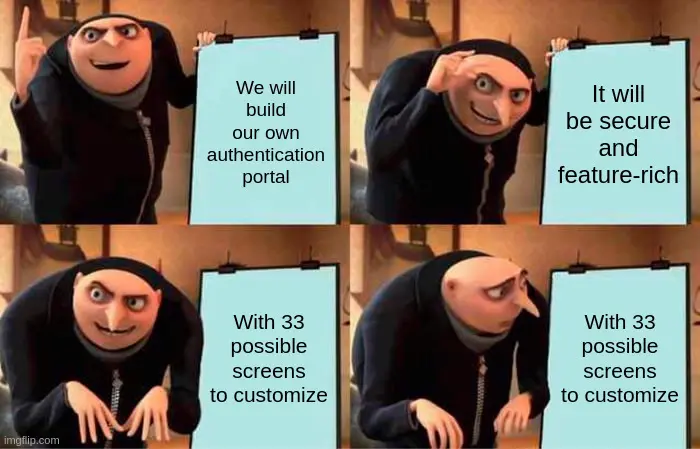
Do you realize now why you do NOT want to build your own portal?
Fortunately, we don’t need to cover all cases for our simple app. I will only customize the following prompts: login, signup, and reset-password. Note that reset-password has multiple screens.
You will notice that most fields come pre-filled using variables. Considering the number of prompts & screens, I recommend you use variables as much as possible.
For each prompt, instead of editing the text fields,you can click on the Raw JSON tab at the top. This allows you to save your customizations and add them to a Git repository, to better track the changes you made to the portal.
At this stage, I recommend going through every possible screen of your authentication portal by yourself, i.e. try logging in, signing up, forgetting your password, etc, and look carefully at each page to see what needs to be customized.
It’s a lot of work, but it will help create a coherent branding for your app.
For example, when you try to reset your password, Auth0 will send you an email. And that email can be customized as well.
4.6. Customize the emails
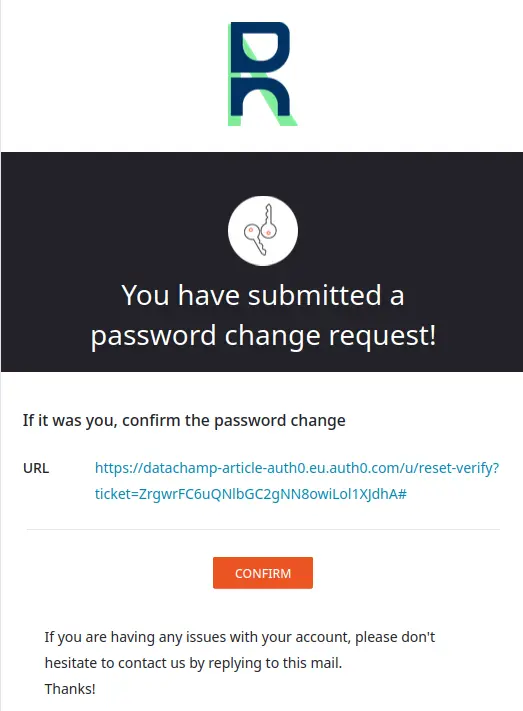
Once again, the default emails are okay-ish. Here’s what the default Password Reset email will look like with the generic branding customizations we made earlier:
But you can still customize both their design and content.
To do so, from the sidebar, click on Branding > Email Templates.
And…

Auth0 will send emails on your behalf only for testing purposes.
Once you get serious and put your app in production, you will need to provide a custom email provider. I cover this part in chapter 5.4. How to Use Emails in Production.
In the meantime, we can still play around with the templates, but be aware they won’t activate as long as you’re still in sandbox mode.
Back to the email templates:
In the Email Templates section, choose Change Password (Link) in the Template dropdown at the top. This is the email the user will receive when trying to reset their password. You can customize:
- The From email address
- The Subject of the email
- The URL to redirect to after validating the new password.
- The URL Lifetime to expire the URL after a few days.
And then…
You can customize the entire HTML body of the email. If you only want to customize some content, look for it in the HTML template and replace the sentences.
However, you could also completely revamp the HTML to make your own.
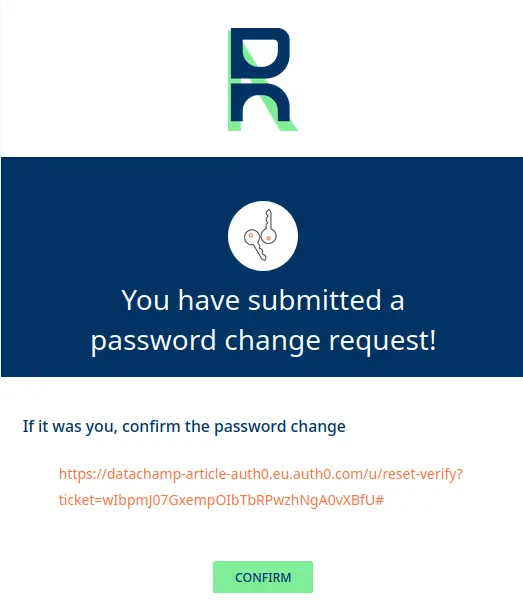
Here is an example where I have removed some text and the colors:
And another example where I remade everything from scratch:
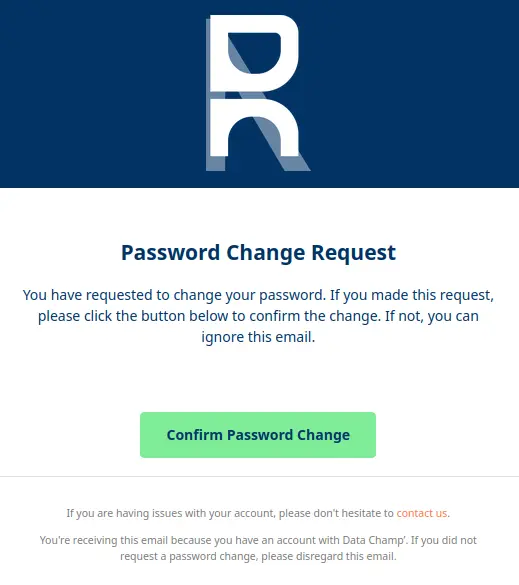
You think this is too cumbersome to do?

I just copy/pasted the default template to “ChatGPT 4o with canvas”, added a PDF with the Data Champ’ design guidelines, and asked to create a new design from scratch.
Feel free to customize as many email templates as you wish.
Now..
You have a secure, functional, and customized authentication portal. We have covered all the essentials you need to get started.
The next section of the article covers some specific use cases that only apply to specific situations, so feel free to skip sub-sections that don’t apply to you.
Also, if you want to do something that we haven’t covered in the article, let us know so that we can add a section about it.
5. Advanced usage of Auth0 in Shiny
5.1. How to remove the ‘Authorize App’ screen after signing up on Auth0?
By default, when a new user signs up, Auth0 displays an ‘Authorize App’ screen:
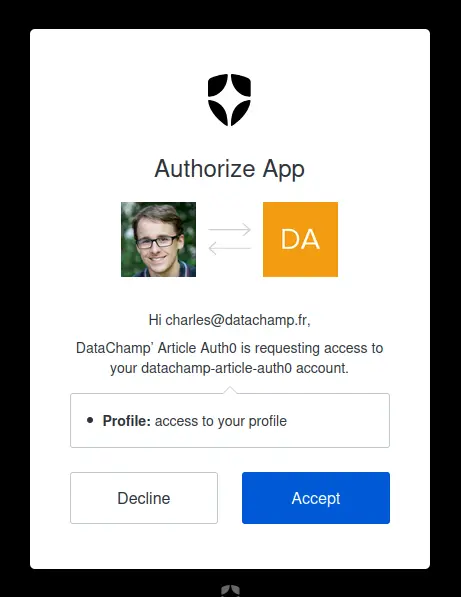
This might surprise you since that’s not part of the standard process when creating an account to any service on the internet.
In general, you fill in your email address, your password, click on “Create Account”, and that’s it. You don’t get asked if the application you’re creating an account for is authorized to access your account. Uh?
Well, this happens because you are running on localhost, in your development environment.
Auth0 detects this as if you were a third-party application, and the application requests the authorization to access the (newly created) user information.
You can read more about it in the Auth0 forums: What is the Authorize App screen during signup?.
This step will not happen when your app will be deployed in production.
5.2. How to Disable Signups in Auth0?
A common need for private apps is to disable signups. For example, you only want to add users manually after signing a contract with them.
N.B.: If what you want is to allow signups only from specific domains (e.g. only authorize employees with @datachamp.fr email domain to create an account), then skip to the next section: 5.3. How to Only Allow Signups From a Specific Domain?
Disabling signups is very easy:
- Go to Authentication > Database
- Click on the Username-Password-Authentication link
- Scroll down to the bottom of the page and tick the Disable Sign Ups toggle.

P.S.: On this screenshot, I have not activated it, so anyone will be able to create accounts.
5.3. How to Only Allow Signups From a Specific Domain?
This part is slightly more tricky, but you will see that Auth0 makes it really easy.
Go to Actions > Library.
A word on Actions before we go further: an Action is a piece of code that will execute every time an event happens. You can have actions:
- Before a user is created (this is what we want)
- After a user is created
- After a user asks to reset password
- After a user logs in
- Etc.
In our case, we want to check the domain of the email address right before the user is created. And if the domain doesn’t match ours, then we block the creation of the account.
Note that you can write any custom Action. The only requirement is to write it in JavaScript. Fortunately, we won’t need to write our own code since we can use existing templates.
Click on Create Action > Use a Marketplace Integration.
In the search bar, type Domain to find the Domain Based Registration action.
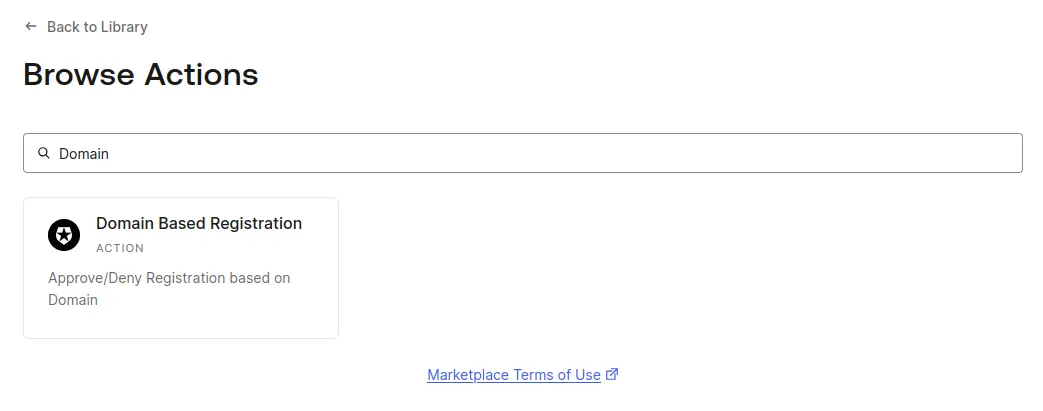
Select it, and then click on Add Integration. Then, all you need is to configure it:
- Approved Domains: Enter the list of domains, separated with a comma. For example:
datachamp.fr - Error: This is the error message you will see in the logs when a user tries to sign up with an unauthorized email address.
- User Error Message: This is the error message users will see when they try to sign up with an unauthorized email address.
Once this is done, you need to configure the Action to be triggered after a user tries to create an account.
Go to Actions > Triggers and choose pre-user-registration.
Drag and drop your new Domain Based Registration Action right between Start and Complete:
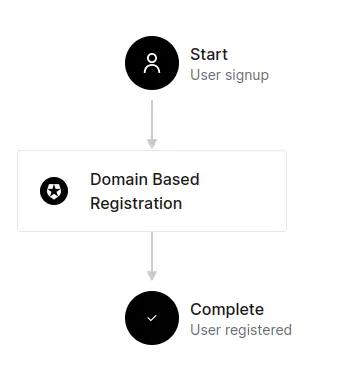
Click on Apply.
Now, your changes are ready. You can try signing up with an unauthorized email address:
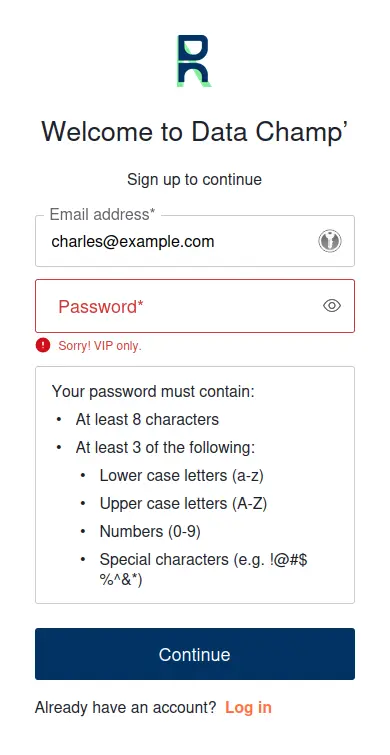
There is one caveat though… What if a user cheats and uses a fake email address with the correct domain?
Nothing prevents the user to use [email protected], create the account, and access the app. So you need a mechanism to enforce the user to confirm the email address before giving them access.
We cover this in section 5.6. How to check if a user has validated its email address.
5.4. How to use emails in production
If you want to use Email Templates, or to have control of the email sending process, you need to provide a Custom Email Provider.
In this section, I will show you one way to do it. But keep in mind you can use any email provider you want, or you could even build your own email server.
In my case, I have been working with Mailjet for the past few years, so I’ll use them as provider for this example.
First, create your Mailjet account.
Once created, go to the API menu and create an API key.

Back to Auth0, go to Branding > Email Provider.
Check the Use my own email provider box, and then SMTP Provider. Fill in the form with the following values:
- From: Enter the email address you want to send emails from, which, by default, should be the same as the one you use to create your Mailjet account.
- Host: Enter
in-v3.mailjet.com - Port: 587
- Username: Enter the Mailjet API key
- Password: Enter the Mailjet Secret key
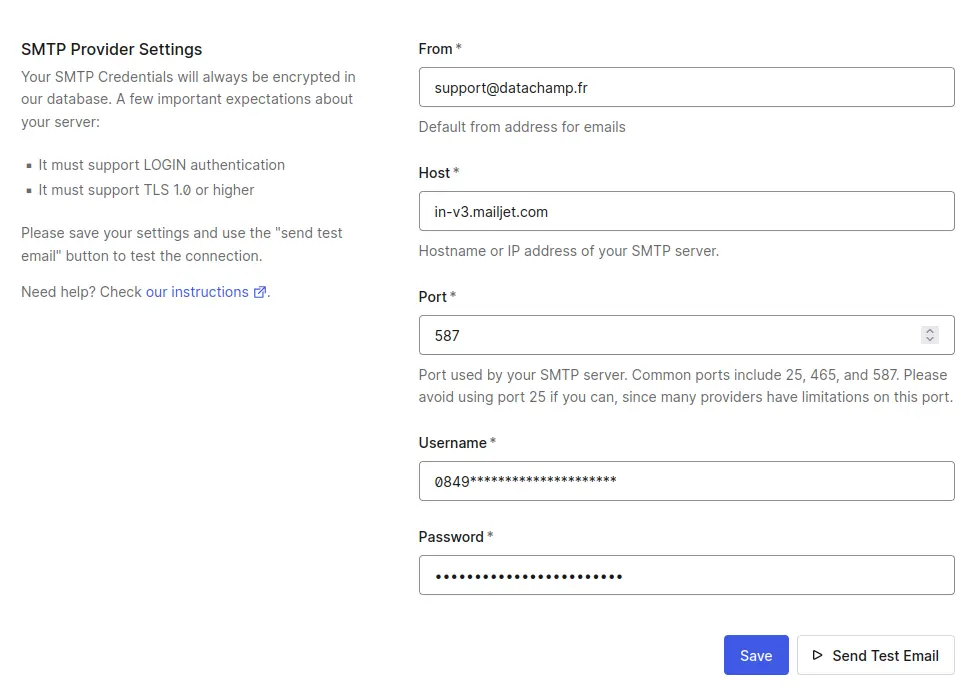
If you click on Send Test Email, it might not work right away.
Mailjet needs to verify that you are allowed to send emails with the email address you have picked.
Go back to Mailjet and to your Account Settings, then Domains and senders.
The unverified addresses will be displayed on this page. You can validate them by asking Mailjet to send a confirmation email, and then confirming your email address.
5.5. How to store and access Auth0 user data in Shiny?
We already covered how to access user information in 4.2. Access User Information After Authentication.
But the information accessible this way is quite limited:
You could want to store more information about the user, such as:
- User preferences: Store settings like language preferences, notification choices, light vs dark theme.
- Application data: Keep track of user-specific information, such as favorite categories or recently viewed items.
- Checks: Record whether user has completed a tutorial, accepted the terms of service, etc.
- Cache: You can cache any resource-intensive computation that is specific to a user.
Since you have access to the sub, or Auth0 ID, you could create your own database and link the user’s data to this ID. But… wouldn’t it be great if you could save yourself the trouble of managing a database and have everything handled by Auth0? We can do this with User Metadata and App Metadata:
From the Auth0 interface, go to User Management > Users, and click on any user in the list. On the Details tab (the one opened by default), scroll down a little bit until you see:
- User Metadata: this is used to store user attributes such as preferences. Users can potentially access this file*.
- App Metadata: this is used to store user information such as permissions or anything that users should not be able to access.
Auth0 is just one (convenient) way to store this data. You could set up you own database, or store the data on the client’s machine (using cookies). If you prefer to use cookies, remember not to store confidential data or data that should not be accessed by the user (such as access rights).
If the data you need to store is confidential, then keep in mind Auth0 is a third party, and it’s up to you to decide if you trust them with that data. As a general rule, I would recommend you host confidential data in an environment you trust and control.
Finally, there is a limitation of 16 MB. It should be enough, as you are not supposed to store a lot of data there.
* It is not entirely clear to me if users can really access it, but Auth0’s documentation states to only store preferences in user metadata. See How can a user access their user_metadata (read/write).
5.6. How to check if a user has validated its email address?
Auth0 has a built-in mechanism to track whether users have confirmed their email addresses or not. This will help you know whether users use an authentic email address or a fake one. By default, every time a user signs up, a confirmation email is sent.
To check whether a specific user has confirmed its email address, go to User Management > Users and select the user’s profile. Next to the email address, you will see whether it has been verified or not:
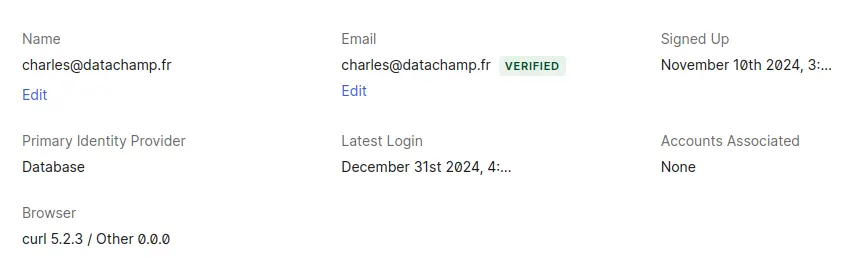
On the Shiny app itself, you will want to differentiate what the user can see depending on whether they are verified or not.
The problem is that, by default, you do not have access to this information from the session$userData$auth0_info object (see 4.2. Access user information after authentication for a reminder).
You will need to expand the scope of this information.
Go back to your configuration file, _auth0.yml, and add the scope field:
name: DataChamp’ Article Auth0
remote_url: ""
auth0_config:
    api_url: !expr paste0("https://", Sys.getenv("AUTH0_TENANT"), ".", Sys.getenv("AUTH0_REGION"), ".auth0.com")
    scope: openid profile email
    credentials:
        key: !expr Sys.getenv("AUTH0_CLIENT_ID")
        secret: !expr Sys.getenv("AUTH0_CLIENT_SECRET")
By default, this field only takes the values openid and profile. By adding email, you will get more information from your session$userData$auth0_info object:
We now have two extra fields: email and email_verified.
Now, it’s up to you, the Shiny developer, to adapt the behavior of the app depending on the value of this variable.
5.7. My app crashes when I refresh the page
Really?
That’s annoying.
So when you refresh the page, using the “Refresh” ⟳ button of your browser, or using F5, or Ctrl+R, it crashes with the following error message:
Error in httr::oauth2.0_access_token(api, app(redirect_uri), params$code) :
  Forbidden (HTTP 403). Failed to get an access token.
Yes. That’s because the URL of your app looks like this:
http://localhost:4050/?code=QGiET0UlOsAMCJddhRhd8voH61iO6sJ4-6yjwXpmPuQrK&state=9Ke1ebSg4K
See the code? It’s a one-time usage code.
And when you refresh, it tries to use the code again, which is not valid anymore. And thus, you receive a Forbidden (HTTP 403) error.
The solution?
Automatically removing the code from the URL using this simple JavaScript snippet:
setTimeout(function(){
    var url = new URL(window.location.href);
    url.search = '';
    history.replaceState(null, '', url.toString());
}, 2000);
I recommend that you add it at the end of your ui function. In our case, that would be:
ui <- fluidPage(
    titlePanel("Basic App"),
    verbatimTextOutput("user_info"),
    auth0::logoutButton(),
    tags$script(
        "setTimeout(function(){
            var url = new URL(window.location.href);
            url.search = '';
            history.replaceState(null, '', url.toString());
        }, 2000);"
    ),
)
auth0::auth0_ui(ui, info = auth0_info)
Let me explain what it does:
- The
setTimeoutfunction is used to trigger the code after 2000 ms. That’s because the?code=...part in the URL doesn’t appear right away. This value is arbitrary, feel free to adjust it. var url = new URL(window.location.href);defines theurlvariable as the browser URL. It is not a simple string but anURLobject.url.search = '';sets the attributesearch(i.e. everything after the?in the URL) to an empty string.history.replaceState(null, '', url.toString());replaces the current URL in the browser with the modified one.
Alright.
That’s it.
You know everything about Auth0 now!
What are you waiting for? Start integrating Auth0 into your Shiny app today and experience the joy of secure and seamless authentication!
Comments
John Peters
Thank you. I have been trying to find a way to remove the code and state from the URL for months!! Your solution works perfectly.